What's a BlendShapeClip? and related things
2021-12-20 00:00:00 -0500 🟦 Jessica Pixel / liftedpixel.netThis will not be a neat post. I will probably clean it up but I wanted to write it down. I am not a professional. I think this is what is happening. If you are not a professional, this may be of use to you. If you are a professional and I’ve made a mistake, PLEASE TELL ME. Twitter: @liftedpixel
What are BlendShapes?
Morph target animation - WikipediaVertex based animation. Think Quake models. These are saved within the mesh. You create a mesh, and set the ‘Basis’. From there, you create a new ‘shape key’. Depending on the program, it’s called something else. I’m going to use ‘shape key’. The mesh keeps the same number of faces/vertex/edges with each shape key. A shape key is basically a list that generally has to stay in order of each vertex of the mesh (it’s <x,y,z>) for that particular shape. The change between shape keys is LINEAR. Each vertex of the mesh will go DIRECTLY to their specified location in a straight line when moving between two keys. Shape keys can be combined. This is basically doing the math to average the <x,y,z> position of each vertex between 3 or more locations (MIX?) or add each <x,y,z> to each other and extend past the numbers of all <x,y,z> (ADD?).
Adding BlendShapes
You have a mesh. Probably want to remove anything from that mesh that is not going to be affected by shape keys. Mesh with shape keys are much heavier than those without, even if they’re not being actively used. I suppose whatever renderer has to be ready to make use of them when rendering your mesh. VRChat and the like limit the number of skinned meshes on your avatar. This is what that is talking about. Any mesh that doesn’t need shape keys saved in it anymore should have them merged into the Basis shape before exporting from Blender into Unity.
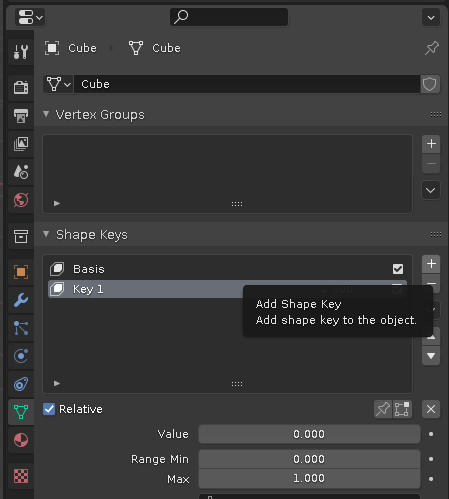
In Object mode, you can make additional keys. There is probably more ways to do it, this is how I do right now. Select your mesh in the collection thing, hit the green triangle vertex shape tab, in the Shape Keys section, hit the + to add a key. Double click to rename it if you want.
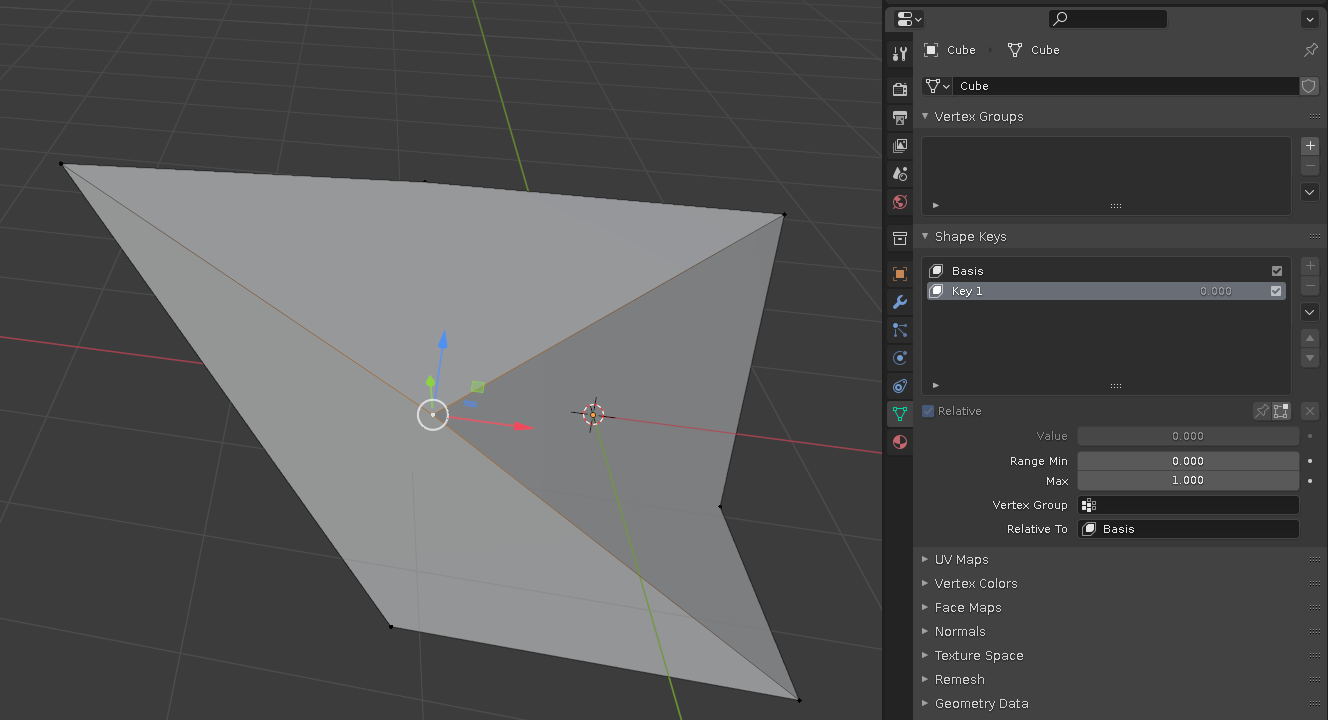
Switch to edit mode, make sure the key you want to edit is selected. You do not want to mess up your Basis shape unless you are sure this is what you want to do. If you already have a whole set of shape keys (VRoid export, CATS tool), editing your Basis will not make those adjustments automatically to the rest of your shapes... as far as I know. How I make overall edits when working with existing shape keys, I create a new key and make the changes (ex: edit the nose shape). From there, you can combine the shapes in Blender, or add that change to your ‘Neutral’ blendshapeclip. More on that later. If you don’t have a ton of shapes, or if the change you need to make isn’t to all of them, or you’re not going to make this into a VRM, you should probably do the needful in Blender. You can as well if you’re going to make a VRM, but blendshapeclip gives you options like that.
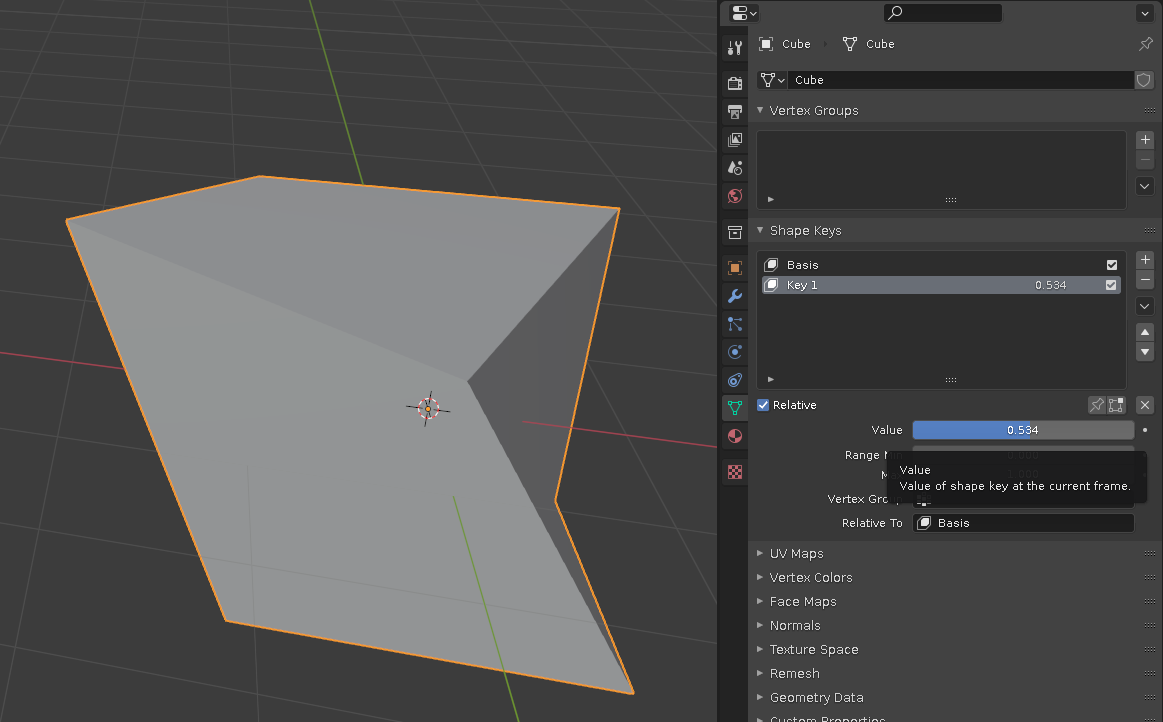
After you edit the shape key how you want, you can click between Basis and your shape to see the difference. Back in Object mode, you can move the Value slider to ‘do the math’ of moving each vertex from the Basis <x,y,z> to the Key 1 <x,y,z>. You can also mix more than 1 shape like this and hit the V under the - to save the mix... I’ll get exact verbiage later, I closed Blender already.
What is a BlendShapeClip?
BlendShape SettingThis is going to be called ‘Expression’ with VRM1.0. https://vrm.dev/en/docs/vrm1/changed/
I’m going to use ‘clips’ for now. Clips are something that the VRM format uses to make avatars work on all platforms. It specifies the shape key(s) associated with a particular expression (which makes sense why it’s going to be called that). There are a handful of standard VRM clips (Neutral, AIUEO, Blink, Fun, Joy, Angry, etc). That’s so a program can easily say to the VRM model ‘do the Angry face’ without needing to know the names of the shape keys within the mesh that correspond with that expression. Clips can combine more than one shape key, and they also have the ability to make changes to the shader values. That allows for changing <x,y> and scale of textures, colors, etc. This is how you can use a texture based face animation without shape keys. VRM1.0 will have MToon1.0 with a lot more shader features that will probably also be accessible with clips (soon to be Expressions).
Using extra shape keys beyond the standard ones is needed so a VRM can be told ‘do the noseSneerLeft face’ by a software using Apple’s AR kit blendshapes. https://developer.apple.com/documentation/arkit/arfaceanchor/blendshapelocation
Adding BlendShapeClips
In Unity. You’ve already got UniVRM and your model in the project. If not, I’ve got another post about that but those are all being reworked because a lot has changed in the VRoid landscape in 6 months.
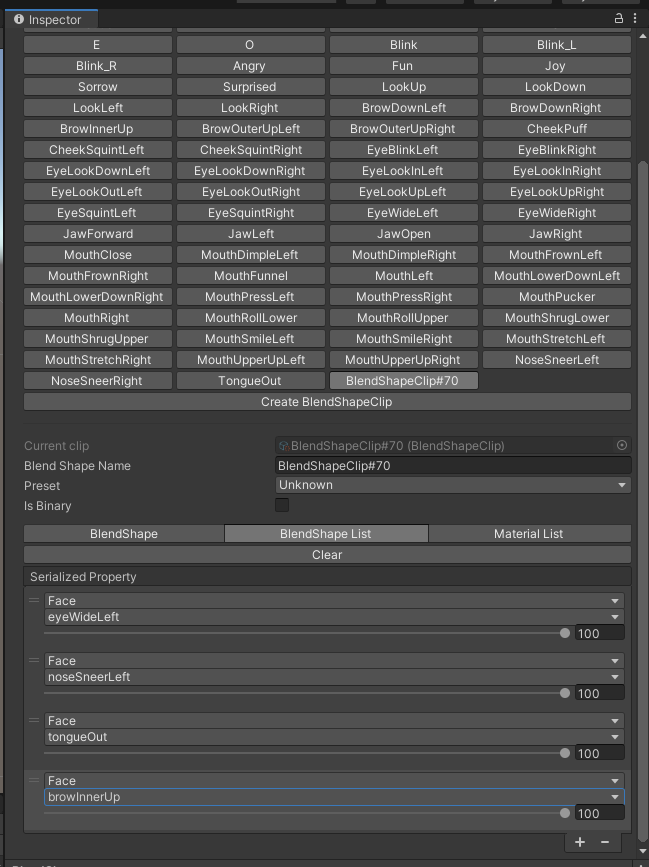
Click the BlendShape asset, you’ll see your avatars current clips in the inspector. If this is a fresh VRoid export, you should have the standard dozen or so. Creating clips is as simple as hitting ‘Create BlendShapeClip’, saving the clip, selecting the new clip in the inspector, and adding the shape keys you want included in the clip.
HANA TOOL
[HANA_Tool_v3] control BlendShapes tool [英語版] - くに屋 - BOOTHHANA TOOL is a Unity tool created by @nikutokuni
Hana Tool can automatically create the 52 clips required for Perfect Sync usage so you don’t have to manually create them. If you already have the shape keys in the mesh, it will automatically assign the appropriate Perfect Sync shape key to it’s corresponding clip.
Remember how there is a list of each vertex location for each shape key is stored in the mesh?
Hana Tool can write that data into a TXT file. It can then put that data into another mesh. Considering that it can read the shape key data in this way, Hana Tool can also create new shape keys by taking the data for only one part of the face (ex: you have a blink shape key, use Hana Tool to create a blink_left and blink_right; you have a smile face shape key, use Hana Tool to create a smile_eyes and smile_mouth). Hana Tool can also edit shape keys by sliders, can over and under the values, combine or change which shapes are associated with each shape key, and a few other things like deleting your transparent meshes since you couldn’t do it during export from VRoid Studio.
Perfect Sync
https://github.com/hinzka/52blendshapes-for-VRoid-faceIf you are using the VRoid official version face, you can add the additional ARKit shapes from these models edited by @hinzka
Download the model with the shape keys you want and import them to your Unity project. Use HANA Tool > Writer to save that models shape key data to a TXT. Then HANA_Tool > Reader to add/overwrite that shape data to your own VRoid. You can pick and choose between the two models shape keys if you want and they are both a little different and aren’t necessarily masc or fem.
After adding the shape keys to your model, use HANA_Tool > ClipBuilder. If none of the default clips have been assigned, you’ll want to go into the BlendShape inspector and make sure the default clips are set. It should do the grunt work of creating the clips and assigning the correct shape keys.
Some of the shape keys will not be great. Sometimes it’s because your face mesh is too different from the mesh you saved the data from. Sometimes it’s because the expression is a little overdone so it can be adjusted back.
PerfectSync facial adjustment TIPS - はいぬっかメモ@hinzka also has a guide to using the Perfect Sync shapes with the VRoid face. There’s several tips, for example, swapping out the ARKit EyeBlinkLeft and EyeBlinkRight with the VRoid Blink_L and Blink_R. Using Hana Tool, making these kind of adjustments is simple. From here you can export your VRM and bring it back into Blender to tune the shape keys further or do more slider wiggling in Unity with Hana Tool. Be sure to Writer your TXT to back up your shapes and easily move them to your other models.
FACE EXPLODE!
Remember how shape keys can only move the mesh around, it doesn’t add or remove any?
This is why deleting transparent meshes or using something other than a VRoid model of the specified version causes it to fail. If all you’ve done is edit the face mesh in VRoid Studio and exported without deleting transparent meshes, the number of and order of vertices will be the same for all models. Because of this, you can take the list of each vertex location for each shape key from one mesh and copy it to another. Deleting transparent meshes will remove more than zero vertex from your face and cause that list not to match up anymore. This is also why when you edit and export from Blender and try to apply that TXT to a mesh that is technically the same vertex wise, but when you start moving sliders the face explodes. The order of the vertices gets rearranged, but since the number is the same, the data is written without error... even though it is very error and often scary.